


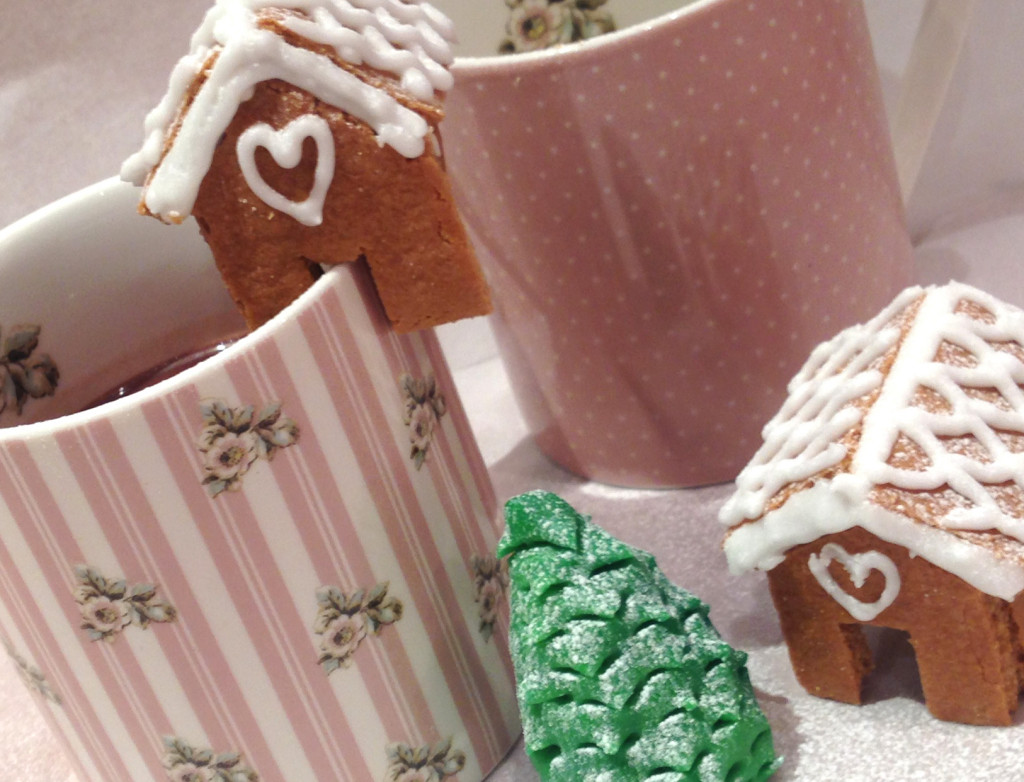
Last week, we shared a picture on our Facebook account of incredibly cute and festive miniature gingerbread houses, that sit on the side of a mug for the perfect tea or coffee break. We actually dug this photo out from last year’s archives because we think it’s just too darn cute not to share. Somewhat predictably, it attracted the same flurry of attention it enjoyed last Christmas. The only problem? We did not actually know where the heck the picture came from, or have a set method for making these little beauties! So, like the nice people we are, myself and my pro baker, Kate, promised we would do our best to work out the best way to make these tiny, tasty houses and then share it with the rest of you.
First, let me tell you, this was not as simple as it looks! Secondly, these photographs were not our first attempt. Thirdly, if you have no patience, click onto the next article now, because these things are a little fiddly. But just a little, so if you do have an ounce of patience, stick around.
The first time around, we tried cutting out the pieces for the houses separately before baking them, as you might do with a large gingerbread house. This failed miserably. Because the houses are so small, even the slightest rising or spreading of the mixture whilst cooking, meant the pieces did not fit together and quite frankly, ended up looking like we’d tried to glue a load of ginger biscuits in a lump. We attempted this twice (see, we are persistent!), before deciding to try a different way. We had no idea if it would work to cut the shapes out after the gingerbread was cooked, but we gave it a whirl, and hey presto we did it. The three key things you need to remember before you start this recipe, are: a) draw and cut out paper templates before you start cooking, so you can cut your shapes quickly, b) roll the gingerbread as thin as possible before putting it in the oven, and c) cut out all your shapes quickly, while the gingerbread is still warm and soft. It does not matter if they harden before you stick them together, as long as they are cut out.
You will need three shapes for your templates, and each house uses two of each. So you need a roof panel, a side panel, and a front/back panel. Like this…..

Okay, onto the recipe. You will need:
120g unsalted butter
100g dark muscavado sugar
4 tablespoons golden syrup
500g plain flour
1 teaspoon bicarbonate of soda
2.5 teaspoons ground ginger
For the decoration:
80ml water
500g royal icing
Method:
1. Preheat your oven to 180°C
2. Melt the butter, sugar and syrup in a saucepan on a medium heat, making sure the mixture does not burn or stick to the pan.
3. Mix the flour, bicarbonate of soda and ginger in a mixing bowl.
4. Add the melted mixture in the saucepan to your dry ingredients, and fold in to make a dough. If you feel it is necessary to add more flour at this point, then do so. You should be left with a solid dough
5. Roll out very thinly and place on a flat baking tray. You may find it easier to do this in batches, and make a few at a time, as the gingerbread cooks very quickly and you want to be cutting out shapes while it’s warm, so you don’t want to have too much cutting out to deal with at one time.
6. Cook for approx 5-10 minutes until the edges begin to turn brown.
Once you’ve got your shapes cut out, you can relax a little and start to prepare to stick them together and decorate them. We used Royal icing to glue the houses together, and decorated with icing as well. You could also add hearts or star shapes, glitter, hundreds and thousands or whatever you like.
To make the Royal Icing:
Combine the Royal Icing sugar and water in a bowl and whisk well, until the icing forms a stiff mixture. Spoon into a piping bag, and get ready to build.
Use the icing to stick the houses together, and then pipe on snow, and roof tiles in whatever style you like. Pop the houses on the side of a mug and prepare for the compliments to come flowing in from your guests!


")
